


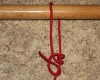
Description
The taut-line hitch is an adjustable loop knot for use on lines under tension.
Use
It is useful when the length of a line will need to be periodically adjusted in order to maintain tension.
It is typically used for securing tent lines in outdoor activities involving camping, by arborists when climbing trees, for creating adjustable moorings in tidal areas, and to secure loads on vehicles.
A versatile knot, the taut-line hitch was even used by astronauts during STS-82, the second Space Shuttle mission to repair the Hubble Space Telescope.
Security
This hitch should not be depended on to hold fast under all conditions. With line made from particularly stiff or slick modern fibers (e.g. polypropylene) this hitch can be difficult to make hold at all.
Sometimes it can be made more secure by using additional initial wraps and finishing half-hitches.
Other names
Taut-line hitch, Adjustable hitch, Rigger’s hitch, Midshipman’s hitch, Tent-line hitch, Tent hitch.
Tying
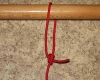
1. Pass the working end around the anchor object. Bring it back alongside of the standing part and make a half-hitch around the standing part.
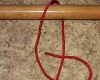
2. Continue with another wrap inside the loop, effectively making a round turn around the standing part.
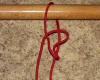
3. Complete with a half-hitch outside the loop, made in the same direction as the first two wraps, as for a clove hitch.
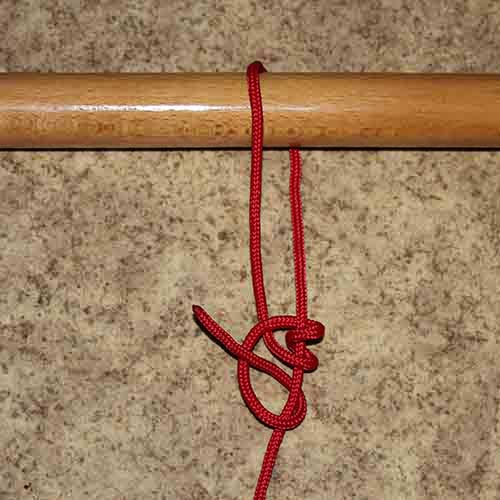
4. Dress by snugging the hitch firmly around the standing part. Load slowly and adjust as necessary.
A+ explanation. My most used knot 🙂
what are some frickin uses???
Did you read the article? Many uses are described in it. See the first section below ‘Description’ labeled ‘Use’.