

Description
The Blake’s Hitch is a friction hitch commonly used by arborists and tree climbers as an ascending knot.
Unlike other common climbing hitches, which often use a loop of cord, the Blake’s hitch is formed using
the end of a rope. Although it is a stable knot, it is often backed up with a stopper knot, such as a
figure-of-eight knot, for safety.
Use
Blake’s Hitch is used for both ascending and descending, and is preferred by many
arborists over other hitches.
Releasing
Non-jamming
Security
A stopper knot should be added to prevent the free end from working its way back through the hitch.
If the hitch does not hold securely due to slickness of the standing line, an extra turn should be made
around the line, with the end still tucked only under two; if the hitching line has trouble gripping
because it is relatively stiff, an extra turn should be made and the end tucked under it (which gives
more thickness for the stiff rope to compress).
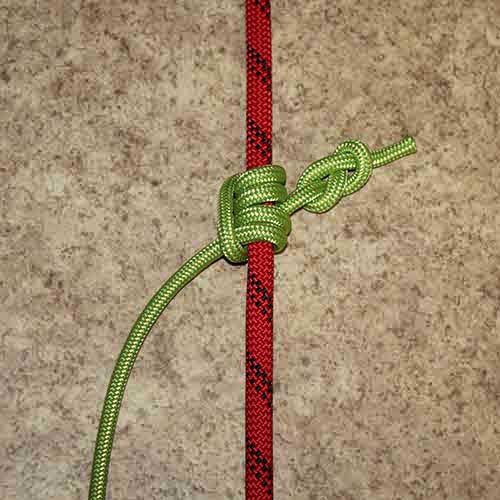
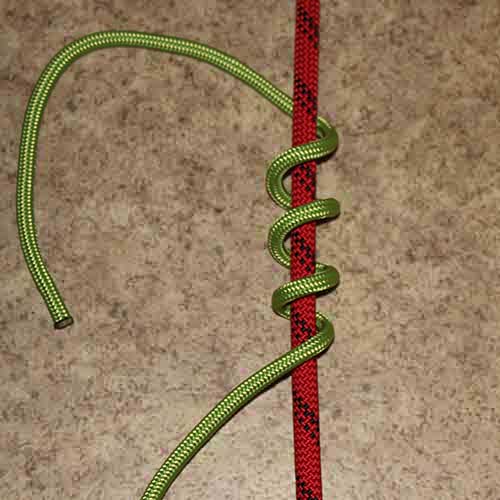
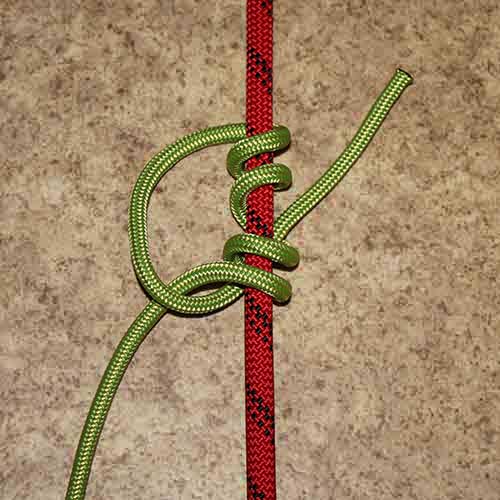
Tying
1. Make four wraps around the line.
2. Bring the wrapping end down to and over standing line, behind static rope and out through 2nd wrap.
3. Tighten the knot and secure with a stopper knot.
In practice it helps to insert your thumb under the first two turns. This facilitates threading the
end later.